
Tile Leveling Clips in 1/32", 1/16" and 1/8"
Break-off tile leveling clips that pair with Next Level reusable wedges. Pick the clip by the grout joint you want: 1/32″ (1 mm), 1/16″ (1.5 mm) or 1/8″ (3 mm). Designed by real tile installers for ceramic and porcelain tile, sold by quote across the US.

What are tile leveling clips?
Tile leveling clips are the break-off spacers of a leveling system. They sit under the edges of two neighboring tiles, set the width of the grout joint and hold the wedge that presses the tiles flat. Once the thin-set cures, the clip snaps off cleanly below the tile surface, so nothing stays in the joint.
Installers also call them tile leveling spacers, tile level clips or leveling clips for tile. Whatever the name, the job is the same: stop lippage, the small height difference between two tile edges that you feel underfoot and see when light rakes across the floor. The clip is one half of the system. The other half is the wedge, and together they make up how the full tile leveling system works. The clip is used once; the reusable wedges that pair with these clips go back in the bucket for the next job.

Which tile leveling clip size do you need?
Every Next Level clip size has its own job. Start from the grout joint you want, then check it against the tile maker’s minimum.
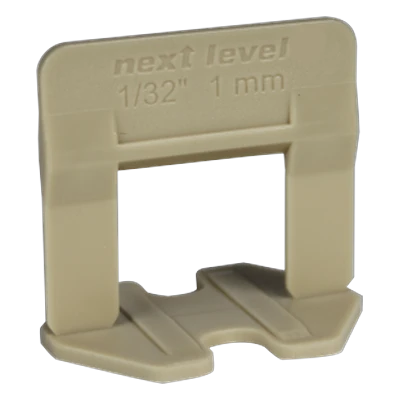
1/32" (1 mm) clips
For ultra-tight joints on rectified porcelain with very consistent edges. Use it only when the tile maker allows a 1 mm joint.
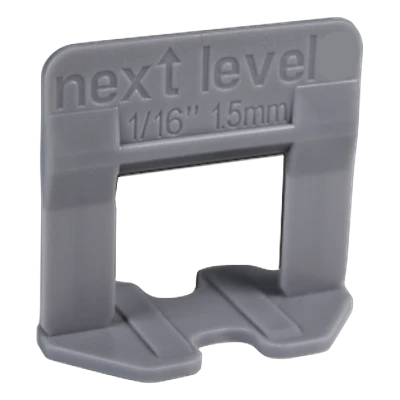
1/16" (1.5 mm) clips
The standard grout line on most porcelain and ceramic floors and walls, including wood-look plank and subway tile.
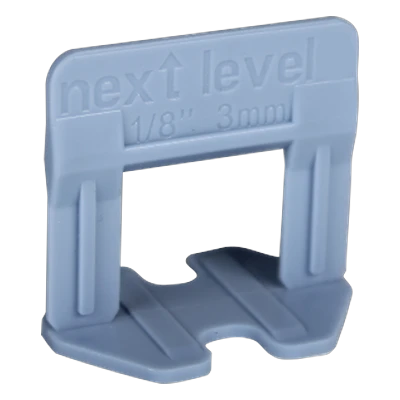
1/8" (3 mm) clips
A common grout joint spacing, usually recommended for ceramic and porcelain tile when you want a narrow but visible grout line, from 12″x12″ to large format.
Which clip is for you?
Good fit
- 1/32" (1 mm): ultra-tight joints on rectified porcelain
- 1/16" (1.5 mm): standard grout line on most porcelain and ceramic
- 1/8" (3 mm): narrow but visible joint, 12"x12" to large format
- Floors, walls, backsplashes and tub surrounds
Look elsewhere
- If you need the reusable part of the system, see the tile leveling wedges
- Natural stone: the system is designed for ceramic and porcelain tile; stone is not specifically recommended, although some installers use it with stone
- Mosaic sheets on mesh: the sheet already sets the joint, so leveling clips are rarely needed
How do you use tile leveling clips?
The clip goes in as you set each tile, so it adds seconds per tile, not an extra step at the end.
1. Clip under each edge
Slide the clip base under the tile edge while the thin-set is fresh. On large format tile, place a clip about every 8 inches along each edge.
2. Set the next tile
Press the neighboring tile into the mortar against the clip body. The clip now sets the grout joint.
3. Wedge in and tighten
Push the wedge through the clip slot and tighten by hand or with leveling pliers until both faces sit flush.
4. Cure, then snap off
When the mortar holds the tile, tap or kick the clip in line with the joint. It breaks at the break point, below the tile surface.
What does a tile leveling clip do?
A tile leveling clip does three things at once: it spaces the tiles, it anchors the leveling force under both tile edges, and it gives way at a precise point once the work is done. Its base slides under the edges of two neighboring tiles, its body sets the width of the grout joint, and its slot holds the wedge that presses the tiles flat. After the thin-set cures, the clip snaps at the break point below the tile surface, so no plastic stays in the joint.
In short: the clip sets the joint and holds the wedge. The clip is used once; the wedge is reused.
How do you choose between 1/32", 1/16" and 1/8" clips?
Choose the clip by the grout joint you want and the tile you are setting. Use 1/32″ (1 mm) for ultra-tight joints on rectified porcelain, 1/16″ (1.5 mm) for the standard grout line on most porcelain and ceramic, and 1/8″ (3 mm) for a narrow but visible line from 12″x12″ to large format.
Always follow the tile manufacturer’s minimum joint width; it is printed on the box or the spec sheet. Calibrated (non-rectified) tile and tile with visible warpage need the wider joint, because the grout line has to absorb the small size differences from one tile to the next. The full tile spacer and grout joint size chart matches common tile sizes to a clip.
How far apart should tile leveling clips go?
On large format tile and thin panels, place a clip about every 8 inches along each edge and double-check that the substrate is flat. Smaller tile needs fewer clips per edge. The clips hold the edges in plane, but they cannot fix a floor that is out of flat, so prepare the substrate first and use the clips to control lippage, not to fill dips.
When do you snap off the clips?
Snap the clips off once the mortar holds the tile and the tiles no longer move; follow the setting time printed on your thin-set. Tap or kick the clip in line with the grout joint, never across it, so the break happens at the break point and the tile edge is not stressed. Collect the wedges as you go.
How are Next Level clips sold?
Next Level clips are sold by quote, by the bag or by the case, with tiered trade pricing for installers who order case quantities. There is no online cart: tell us the size, the quantity and the state you ship to, and the team sends the quote. Call (813) 426-6875 or email info@nextleveltilesupplies.com.
Which clip size matches your grout joint?
A quick summary. The complete chart by tile size, edge and room lives on the tile spacer size chart.
| Clip | Use it for | Result |
|---|---|---|
| 1/32″ (1 mm) | Rectified porcelain with near-zero edge variation | Ultra-tight joint |
| 1/16″ (1.5 mm) | Most porcelain and ceramic floors and walls | Standard grout line |
| 1/8″ (3 mm) | Ceramic and porcelain from 12″x12″ up to large format | Narrow but visible joint |
| Tile maker’s minimum | Does the spec call for a wider minimum joint? | Always follow the tile maker’s minimum |
| Edge warpage | Is the tile warped or calibrated (not rectified)? | Use the wider clip |
Tile leveling clips FAQ
Match the clip to the grout joint: 1/32" (1 mm) for ultra-tight joints on rectified porcelain, 1/16" (1.5 mm) for the standard joint on most porcelain and ceramic, and 1/8" (3 mm) for a narrow but visible joint from 12"x12" up to large format. The tile maker's minimum joint always comes first.
Yes. The 1/8" clip is a common grout joint spacing for ceramic and porcelain from 12"x12" to large format when you want a narrow but visible grout line. Check the tile maker's minimum joint for rectified or calibrated tile.
No. The clip base stays under the tile and is snapped off after the mortar cures. The wedges are the reusable part of the Next Level system.
After the thin-set has set enough that the tiles no longer move. Kick or tap the clip in line with the grout joint so it breaks at the break point.
Yes. The clips hold wall and backsplash tile in plane while the mortar cures. Set from the bottom row up and support the first row.
For large format tile or thin panels, place a clip about every 8 inches along each edge. Smaller tile needs fewer clips.
No. The precision break point snaps below the tile surface, leaving the joint clear for grout.
The system is designed for ceramic and porcelain tile applications. Stone is not specifically recommended, although some installers choose to use the system with stone.
Clips are sold by quote, with tiered pricing for trade accounts on case quantities. Request a quote with the size and quantity you need.
Keep reading
The complete system
Clips, wedges and the steps that keep tile flat while the thin-set cures.
The reusable half
The part of the system you keep and use again on the next job.
Pick the size
Grout joint by tile size, edge and room, and the clip that sets it.
Questions
Straight answers about ordering, trade accounts and the system.
Get pricing for leveling clips
Tell us the clip size, the quantity and the state you ship to, and the Next Level team will send a quote. Call (813) 426-6875 or email info@nextleveltilesupplies.com.